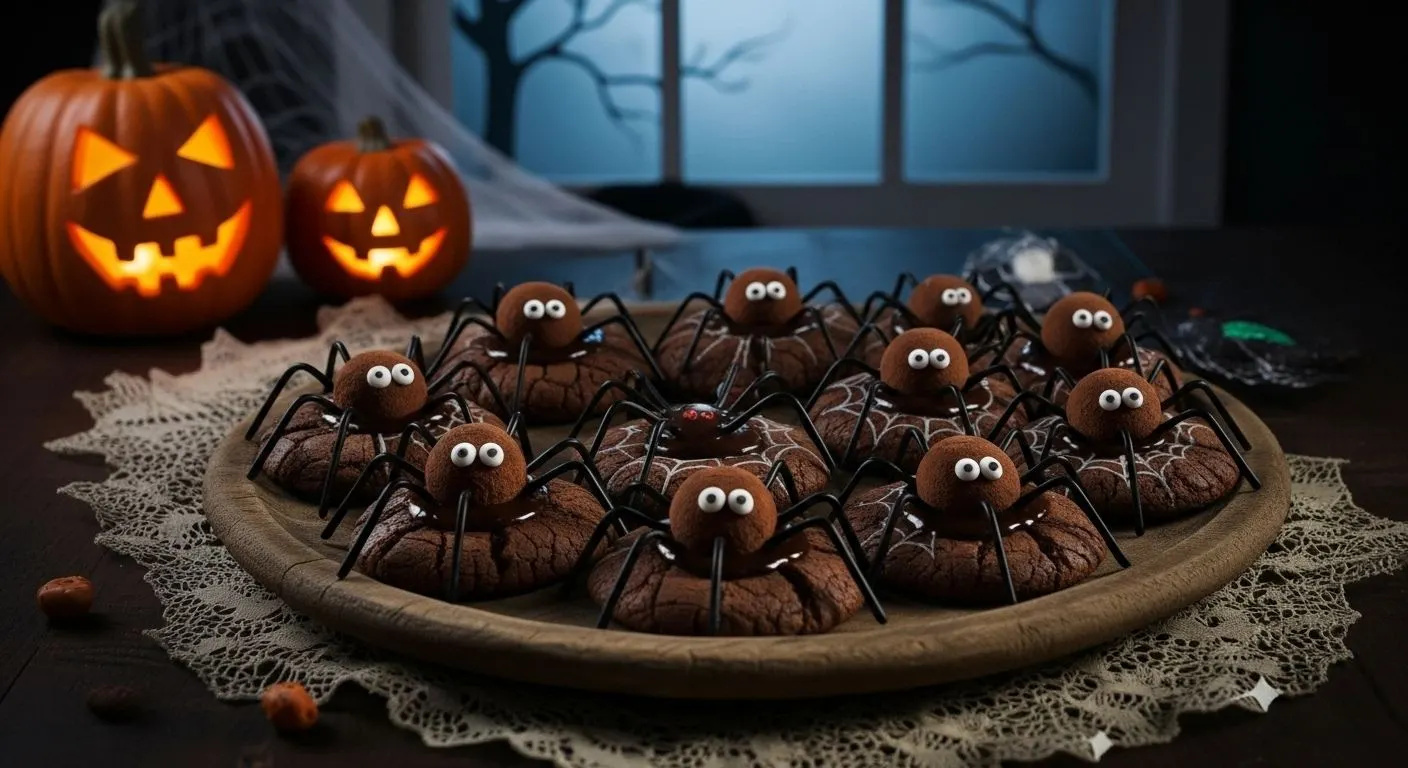
These Spooky Spider Cookies are the kind of Halloween treat that looks creepy but tastes amazing. You only need a few basic ingredients, and you can make them in less than 30 minutes. Kids love them, and adults can’t resist them either.
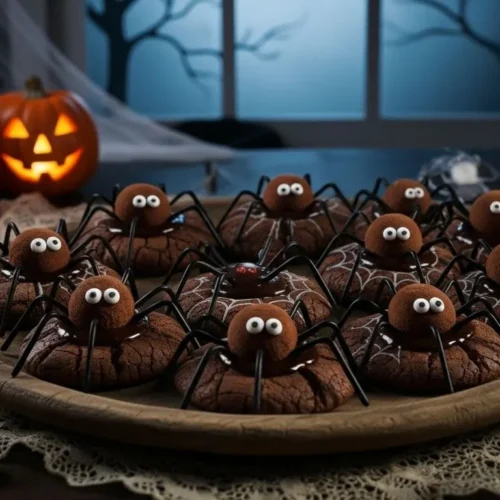
Each cookie looks like a little chocolate spider sitting on top of a soft cookie, with peanut butter filling and candy eyes staring up at you. They’re great for school parties, trick or treat nights, or Halloween dessert tables.
In this post, I’ll show you how to make them step by step. You’ll also find tips for keeping them from melting and fun ways to decorate them differently.
Spider Peanut Butter Cookies
Why You’ll Love These Cookies
- Simple ingredients: You can find everything at a grocery store.
- Fun for kids: Perfect for baking together before Halloween.
- Looks impressive: They look fancy, but they’re actually easy.
You don’t need to be a pro baker. Just follow the steps, and you’ll have spooky, chocolatey cookies that everyone talks about.
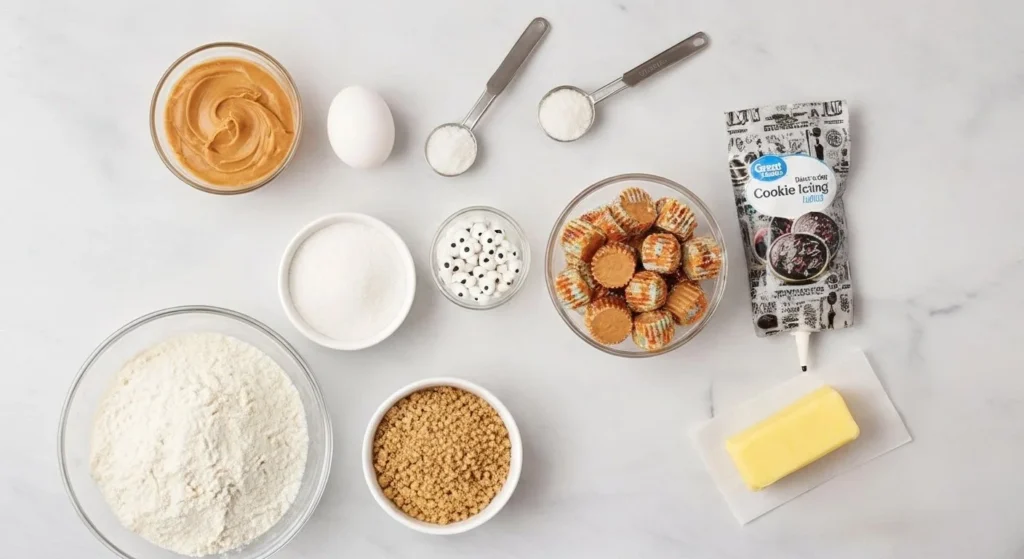
Ingredients You’ll Need
Use this list as your shopping guide:
- 1 cup butter, softened
- 1 cup brown sugar
- ½ cup white sugar
- 2 large eggs
- 2 teaspoons vanilla extract
- 2 ½ cups all-purpose flour
- 1 teaspoon baking soda
- ¼ teaspoon salt
- ¾ cup cocoa powder
- Mini peanut butter cups (Reese’s or similar)
- Candy eyes
- Melted chocolate or black icing for “legs”
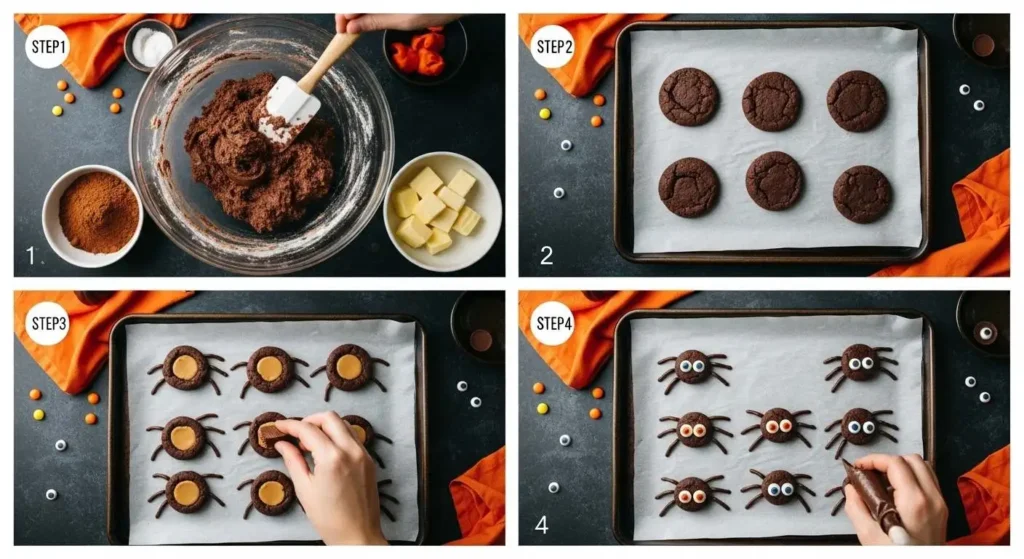
Step by Step Instructions for Spooky Spider Cookies
Step 1: Make the Cookie Dough
- Cream together butter, brown sugar, and white sugar until smooth.
- Add eggs and vanilla. Mix until fully blended.
- Stir in flour, cocoa powder, baking soda, and salt.
- Mix until you have a soft dough.
If you want your cookies extra chewy, chill the dough for 30 minutes before baking.
Step 2: Bake the Cookies
- Preheat oven to 350°F (175°C).
- Roll dough into small balls (about 1 tablespoon each).
- Place on a lined baking sheet, spaced about 2 inches apart.
- Bake for 8–10 minutes until edges set.
Let cookies cool for 2–3 minutes, but don’t move them yet. You’ll add the “spiders” while they’re still warm.
Step 3: Add the Peanut Butter Cup Body
- Unwrap mini peanut butter cups.
- Gently press one into the center of each warm cookie.
- Let cool completely before decorating.
If the peanut butter cups start to melt, chill the cookies in the fridge for 10–15 minutes.
Step 4: Make the Spider Legs and Eyes
- Melt a small amount of chocolate or use black writing icing.
- Use a piping bag (or zip bag with a tiny corner cut) to draw eight legs around each peanut butter cup.
- Add two candy eyes on the peanut butter cup top using a dab of melted chocolate as glue.
Let everything set before stacking or storing.
Tips for Perfect Halloween Spider Cookies
Use the Right Chocolate
If you live somewhere warm, choose chocolate that doesn’t melt too easily.
You can also chill the peanut butter cups before adding them to help them keep shape.
Don’t Overbake
The cookies should stay soft. Overbaked cookies will get hard and won’t hold the peanut butter cups well.
Add Variety
Try making spiders with mini chocolate truffles, Rolos, or even malt balls instead of peanut butter cups.
How to Store Spooky Spider Cookies
- At room temperature: Keep in an airtight container up to 4 days.
- In the fridge: Store up to a week.
- To freeze: Place undecorated cookies in a freezer bag for up to 2 months. Add peanut butter cups and eyes after thawing.
These cookies also make great edible gifts. Wrap them in clear treat bags and tie them with orange ribbon.
| Calories | 180 kcal |
| Carbohydrates | 19 g |
| Dietary Fiber | 1 g |
| Sugars | 12 g |
| Protein | 3 g |
| Total Fat | 11 g |
| Saturated Fat | 6 g |
| Cholesterol | 20 mg |
| Sodium | 85 mg |
| Potassium | 95 mg |
| Calcium | 20 mg |
| Iron | 0.7 mg |
Serving Ideas
- Serve with warm apple cider or hot chocolate at a Halloween party.
- Arrange them on a black platter with fake spider webs.
- Pack a few in lunch boxes for a fun October surprise.
| Problem | Cause | Fix |
|---|---|---|
| Peanut butter cups melting | Cookies too hot | Let cookies cool 2–3 mins before pressing cups |
| Legs spreading too wide | Chocolate too warm | Let it cool slightly before piping |
| Eyes falling off | Not enough chocolate glue | Use a bit more melted chocolate under eyes |
Recipe FAQs
Can I use store bought cookie dough?
Yes. Choose chocolate cookie dough for the best look. Just bake as directed, then decorate.
What can I use instead of peanut butter cups?
Try mini chocolate balls, Rolos, or cookie dough truffles.
Can I make them ahead?
Yes. Bake and cool cookies, but add peanut butter cups and eyes the next day to keep them neat.
Do I have to use candy eyes?
No. You can use small white chocolate chips with a dot of melted chocolate for pupils.
Conclusion
These Spooky Spider Cookies are a simple way to bring Halloween fun to your kitchen. They look creepy but taste like pure chocolate peanut butter joy.
You don’t need fancy tools or special skills just basic baking gear and a sense of fun. Try them once, and you’ll make them every October.
If you liked this recipe, check out my Pumpkin Cookies, next.
Spooky Spider Cookies
Ingredients
- 1 cup butter softened
- 1 cup brown sugar
- ½ cup white sugar
- 2 large eggs
- 2 teaspoons vanilla extract
- 2 ½ cups all-purpose flour
- 1 teaspoon baking soda
- ¼ teaspoon salt
- ¾ cup cocoa powder
- Mini peanut butter cups Reese’s or similar
- Candy eyes
- Melted chocolate or black icing for “legs”
Instructions
Step 1: Make the Cookie Dough
- Cream together butter, brown sugar, and white sugar until smooth.
- Add eggs and vanilla. Mix until fully blended.
- Stir in flour, cocoa powder, baking soda, and salt.
- Mix until you have a soft dough.
- If you want your cookies extra chewy, chill the dough for 30 minutes before baking.
Step 2: Bake the Cookies
- Preheat oven to 350°F (175°C).
- Roll dough into small balls (about 1 tablespoon each).
- Place on a lined baking sheet, spaced about 2 inches apart.
- Bake for 8–10 minutes until edges set.
- Let cookies cool for 2–3 minutes, but don’t move them yet. You’ll add the “spiders” while they’re still warm.
Step 3: Add the Peanut Butter Cup Body
- Unwrap mini peanut butter cups.
- Gently press one into the center of each warm cookie.
- Let cool completely before decorating.
- If the peanut butter cups start to melt, chill the cookies in the fridge for 10–15 minutes.
Step 4: Make the Spider Legs and Eyes
- Melt a small amount of chocolate or use black writing icing.
- Use a piping bag (or zip bag with a tiny corner cut) to draw eight legs around each peanut butter cup.
- Add two candy eyes on the peanut butter cup top using a dab of melted chocolate as glue.
- Let everything set before stacking or storing.
Video
Notes
- Peanut Butter Cups: Mini peanut butter cups work best for creating the “spider bodies.” Chill them before adding so they hold their shape.
- Spider Legs: Use melted chocolate or chocolate icing in a piping bag to draw the legs. You can also use thin licorice strings for a fun twist.
- Eyes: Candy eyes add a spooky touch! If you don’t have them, use small white chocolate dots with mini chocolate chips as pupils.
- Cookie Base: Any chewy chocolate cookie works great. You can use homemade or store-bought for an easy shortcut.
- Storage: Store cookies in an airtight container at room temperature for up to 3 days or refrigerate for up to a week.
- Serving Idea: Perfect for Halloween parties, bake sales, or spooky movie nights — they’re cute, creepy, and delicious!
🍽️ Nutrition Facts (Per Cookie)
Calories: 180 kcal |Carbohydrates: 19 g |
Fiber: 1 g |
Sugars: 12 g |
Protein: 3 g |
Fat: 11 g |
Saturated Fat: 6 g |
Cholesterol: 20 mg |
Sodium: 85 mg |
Potassium: 95 mg |
Calcium: 20 mg |
Iron: 0.7 mg

